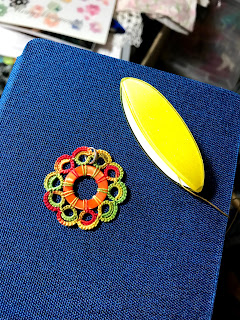
I finished the flower motif I was making with my Jean Roux shuttle. I've been asked how to wind the shuttle, and there's nothing like pictures for a how-to!
First, I simply pulled the bobbin out of the case. I was pleasantly surprised at how much thread was left on the bobbin.
I believe the red thread at the bottom is there to keep the bobbin from sliding out of the shuttle.
Apparently, I forgot to take a picture of passing the thread through the shuttle case, but if you look at the top two pictures you can see that all that's needed is to pass the thread from the outside through the inside of the shuttle case. I used a slip knot to attach the thread to the spool. It was a bit fiddly to get started, but once I got started I was able to wind the thread easily.
I'm not sure if it makes a difference which way the thread is wound, but I wound it the same way as I received it.
I probably could have wound more thread onto the bobbin, but this was enough for me. The next step is to insert the bobbin into the shuttle case, making sure to draw the thread through the slit .
I didn't think to measure how much thread I wound on to the bobbin, but now you can see that it is ready for a ring and chain pattern. If I wanted to tat a rings only pattern like the one shown in the first picture, I would simply snip the thread from the ball. Easy peasy!


