Well, the whole house isn't ready, but my little silver tree is ready with Ice Drops!
My goal was to have one Ice Drop on each branch.
I needed four more Ice Drops to complete the tree.
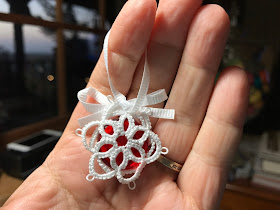
My mom's favorite color is red, so I think of her whenever I see or use red.
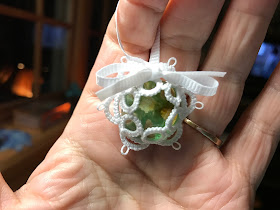
I really like the way the back secures the glass gem. It seems a little more important with the weight of the glass.
After tatting a couple, I got to thinking it might work to make the rings on the back 8+8 instead of 4+4+4-4.
The back does have a slightly different look. I guess it's just a matter of personal preference.
I also played around with picots.
Little changes help to make each Ice Drop unique.
My little silver tree is ready for gift giving. I'll probably keep tatting Ice Drops all the way up to Christmas. I sure would hate to run out!
My goal was to have one Ice Drop on each branch.
I needed four more Ice Drops to complete the tree.
My mom's favorite color is red, so I think of her whenever I see or use red.
I really like the way the back secures the glass gem. It seems a little more important with the weight of the glass.
After tatting a couple, I got to thinking it might work to make the rings on the back 8+8 instead of 4+4+4-4.
The back does have a slightly different look. I guess it's just a matter of personal preference.
I also played around with picots.
Little changes help to make each Ice Drop unique.


Sparkling !!!!
ReplyDeleteVery ingenious! And very good tutorial. Thank you very much !
ReplyDeleteYour ice drop tree is lovely!
ReplyDeleteIt is wonderful to see the tree with the ice drops on it! I love the red ones (my favorite color also) but right now I only have amber drops on hand, but I'm happy to have them to try the pattern ASAP! You worked hard to come up with this wonderful design! Thanks again for the great tutorial!
ReplyDeleteI seem to recall that you received the amazing crocheted doily as a gift? It's perfect under the tree!
Sweet Ice Drop Tree!!! :)
ReplyDeleteSo beautiful :) Now what was your address ha ha ha!
ReplyDeleteLovely sparking tree with the ice drops, I love the red I bet that shines out on your tree
ReplyDeleteSo pretty and sparkly!
ReplyDeleteLovely! They look great! I'm going to be giving these a try.
ReplyDeleteI love your beautiful silver tree with your beautiful Ice Drops. I do like the back you have shown.
ReplyDelete