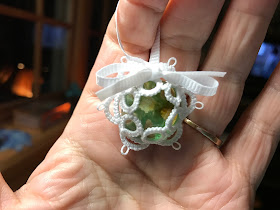
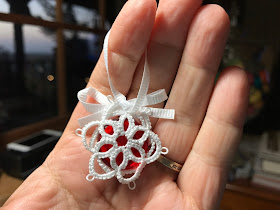
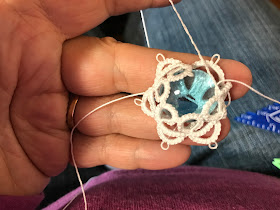
Well, I finally tatted an Ice Drop that is exactly the way I want it. To top it off, I remembered to write down what I did and I took pictures each step of the way!
First, I highly recommend that you purchase Edda Guastalla's 15 page
tutorial on creating bezel settings with tatting. It's only $5.44, and I find it to be very easy to understand. It's loaded with pictures and it really helped me make sense of the whole process. I also recommend
this YouTube video on needle tatting with a cabochon. I don't needle tat, but watching the process gave me the ideas I needed to create my Ice Drop.
Are you ready?
I used size 20 Lizbeth thread and a Moonlit shuttle from Handy Hands. I read somewhere that 5 wraps around the post allows enough thread for one ring, so I wrapped the thread around 62 times (two extra wraps for good measure). This is a shuttle and ball pattern.
The rings for the back side are all 4-4-4-4. I usually use a picot gauge, because my picots are all over the place without one. My joining picots were all made with the first mark on my Handy Hands picot gauge.
On the first ring only, the second picot is very large. As you can see, I used the 1/2" mark.
After the first ring, reverse the work and chain 6-6.
I used the 1/4" mark for the picots on the chains.
Reverse work and tat a ring 4+4+4-4, joining to the last picot of the previous ring and the large picot.
Reverse work and continue the ring and chain pattern, joining the last ring to the first picot of the first ring. I used a lock join to connect the last chain to the base of the first ring. Do NOT cut.
Reverse work and tat a 6-6-6 ring.
Tip: I've discovered that if I just fold the ring toward the center (away from me) and move the ball thread to the front, tat the chain, and then lift the ring to join the next ring, I don't get confused by reversing after rings and chains. I hope that makes sense!
Reverse work and chain 8. I used a lock join to join the chain to the base of the next ring on the previous round.
Continue making rings (6+6-6) and chains (8, lock join to base of next ring on previous round).
Before joining the sixth ring to the first ring, slide the glass gem into place.
Note: I've been asked about the size of the glass gems and where to purchase them.
The glass gems I've used are about 3/4". Some are slightly larger, some slightly smaller. The stitch count and/or the number of rings and chains can easily be changed to accommodate any size gem or coin.
If your bezel setting is too loose, soak the finished piece in hot water for about 15 minutes and then let it dry. My thanks goes out to Marie of West Pine Creations for this tip!
I have purchased the glass gems at Hobby Lobby and Dollar Tree in the floral section. I have seen them at JoAnn Fabrics and Amazon. I've also been told that they can be found in pet stores near the aquarium supplies.
Join the last ring to the first ring.
Tat the last 6 ds and close the ring.
Reverse work, chain 8, lock join to base of next ring on the previous round. Cut, tie, and hide ends.
Add a ribbon for a hanger.
And there you have it! This pretty little Ice Drop is ready for the tree, and it looks nice from both sides.
Update for Lucky Pennies:
I think I've found a stitch count I like. Follow the directions for the Ice Drop, but make some minor changes in the stitch count... On the back rings are 6-6-6, chains are 6-6. On the front, rings are 5-4-5, chains are 7. I've found that I greatly prefer 1/8" ribbon to 1/4" ribbon. There's nothing quite like shiny new pennies!


