Thursday, September 27, 2018

Concentration

I can't believe it's been so long since I've posted, but I've been concentrating on a couple of projects and I've been at school quite a bit this week.


My concentration paid off! I finished this scarf this evening. I'd piddled around with it, because I knew it wasn't going to be as long as I'd hoped. It will be nice for tucking in to the neckline of a coat, but it won't wrap around and around the way I like. I do like the colors, so I know I will use it.


I also made good progress on my granddaughter's afghan. I finished the second ball and started the third. I don't think there's any way I'll finish this by the end of September, but I'll try!


My craft supplies are taking over the house. I'm going to have to tame them soon. Luckily, Dave's projects are spread all over the outside, so he doesn't say much about my stuff taking over the inside of the house!


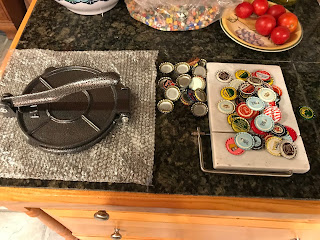
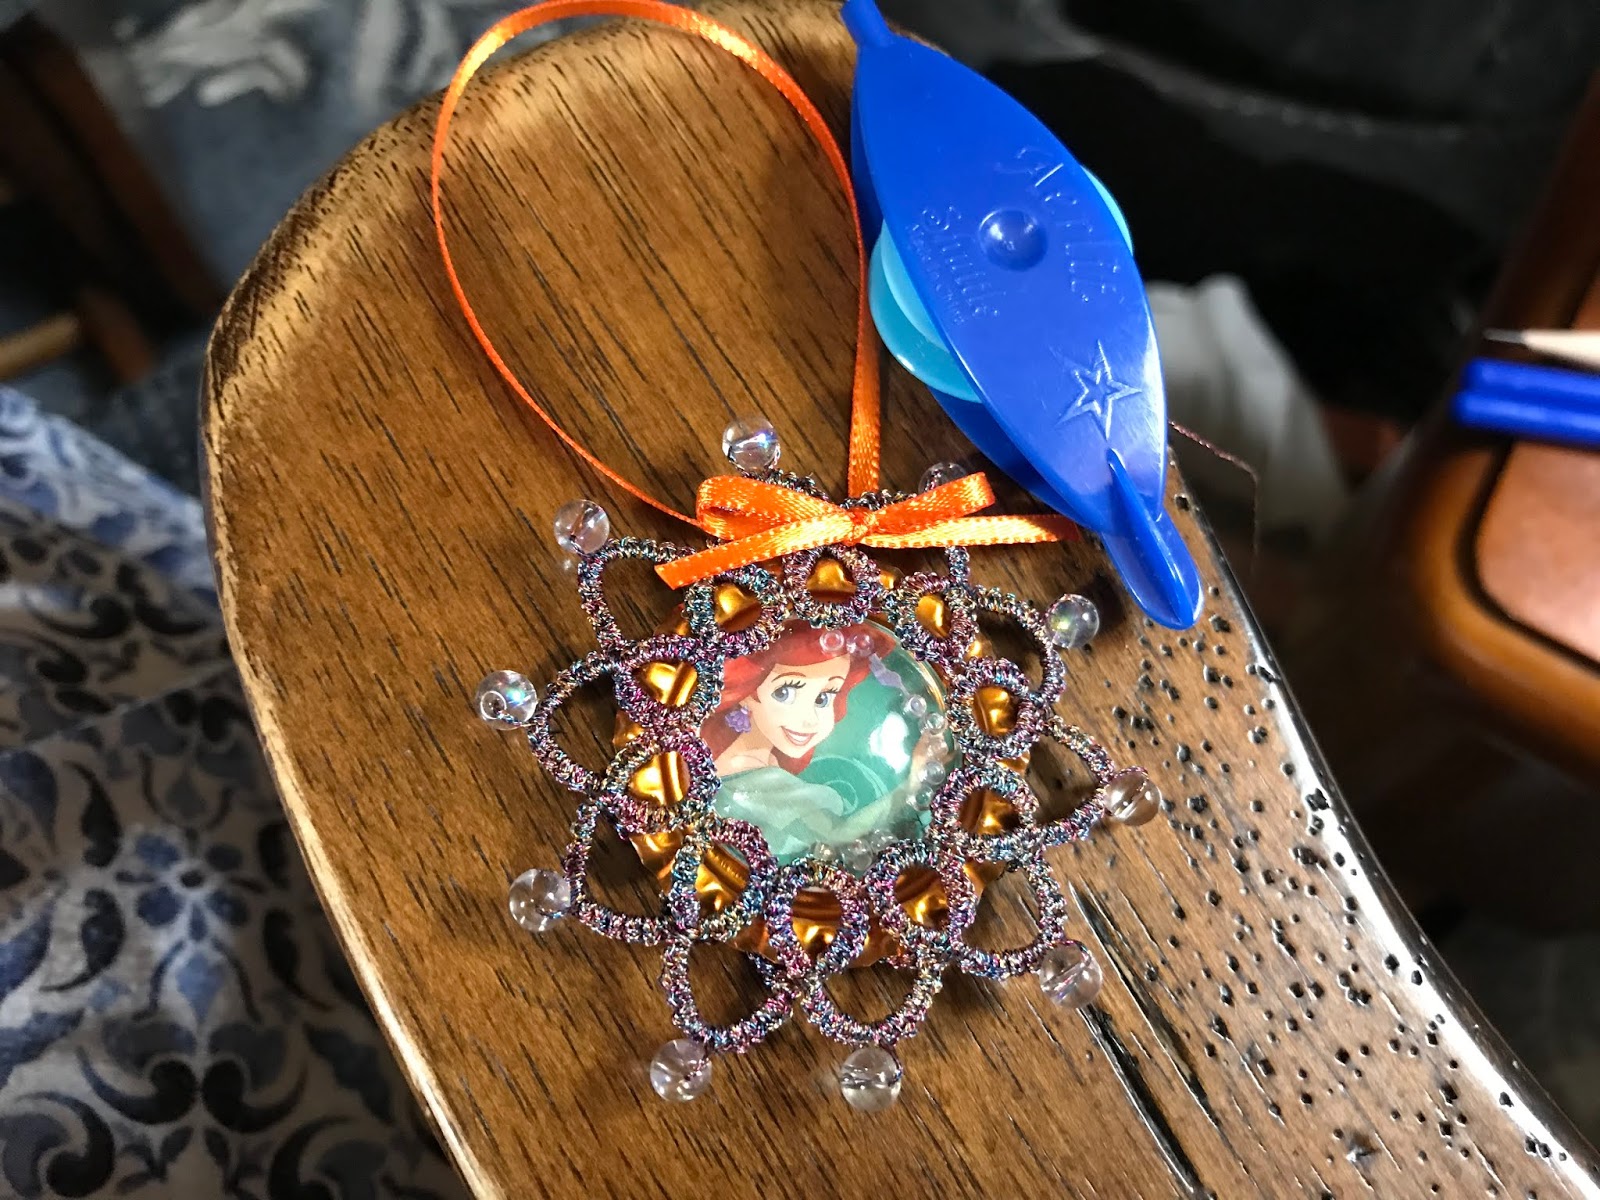
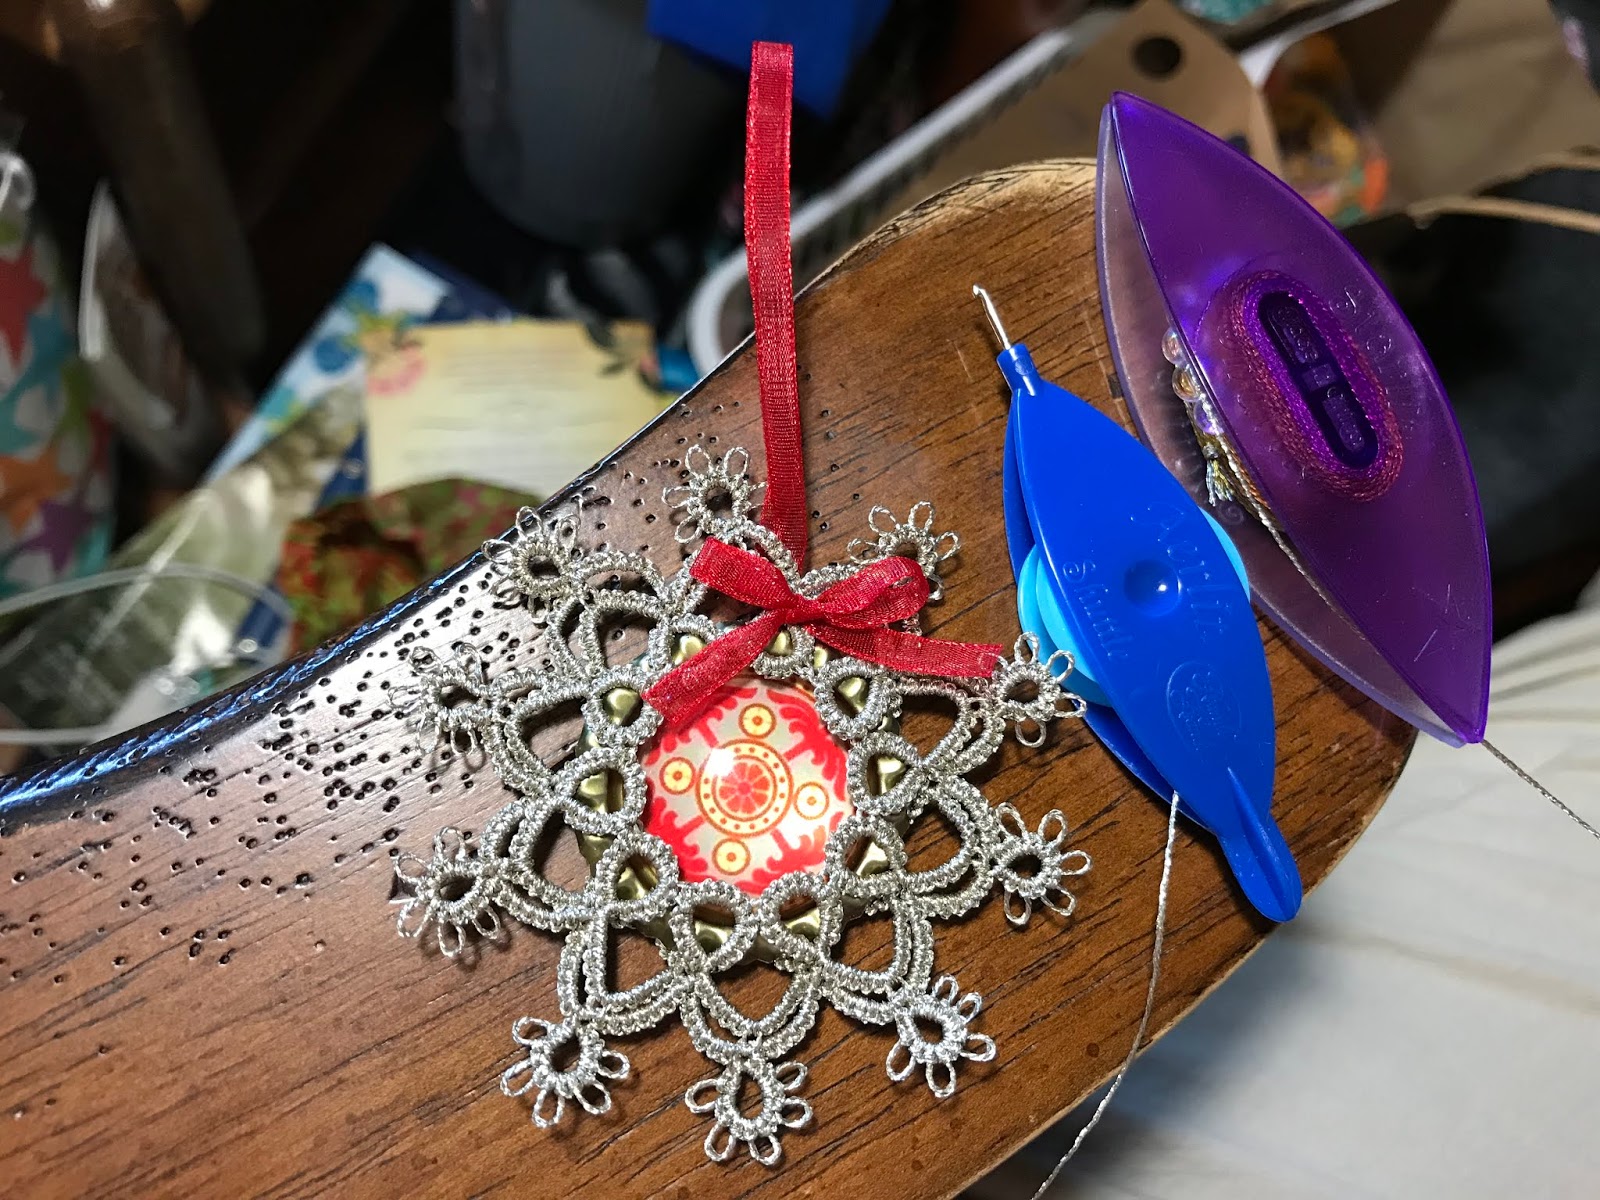
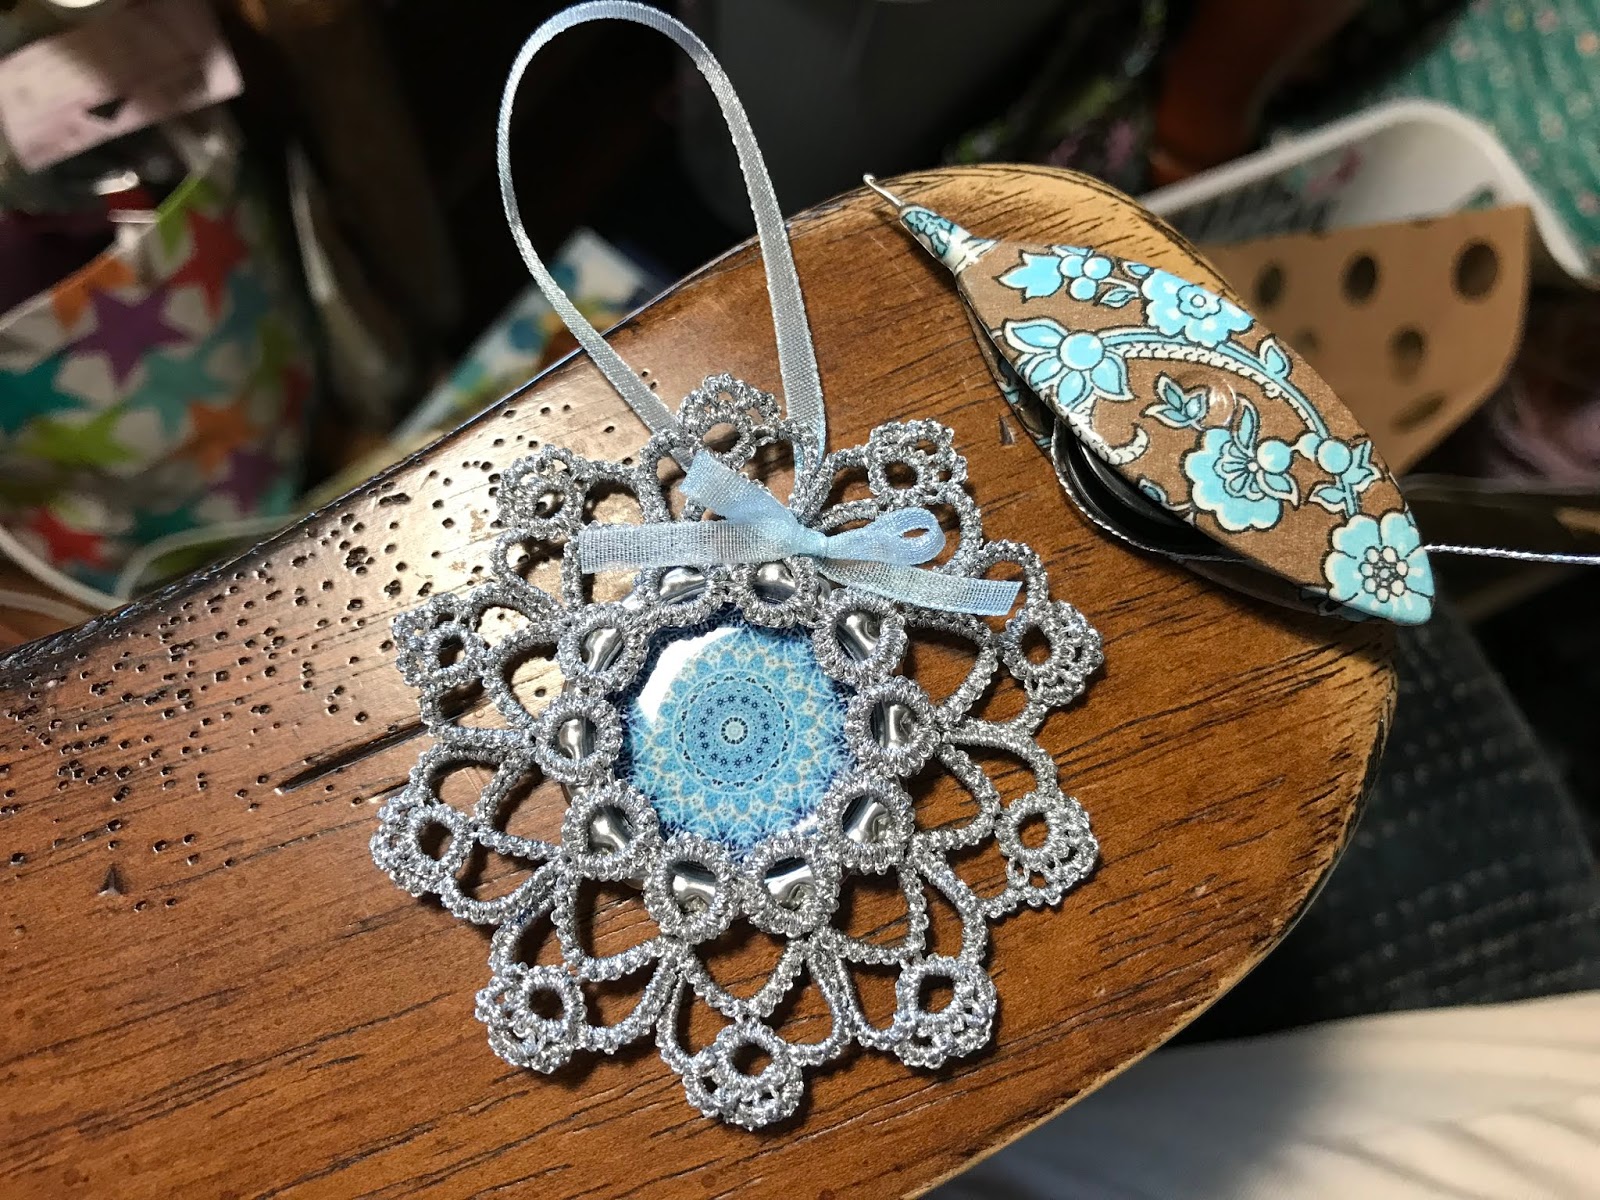
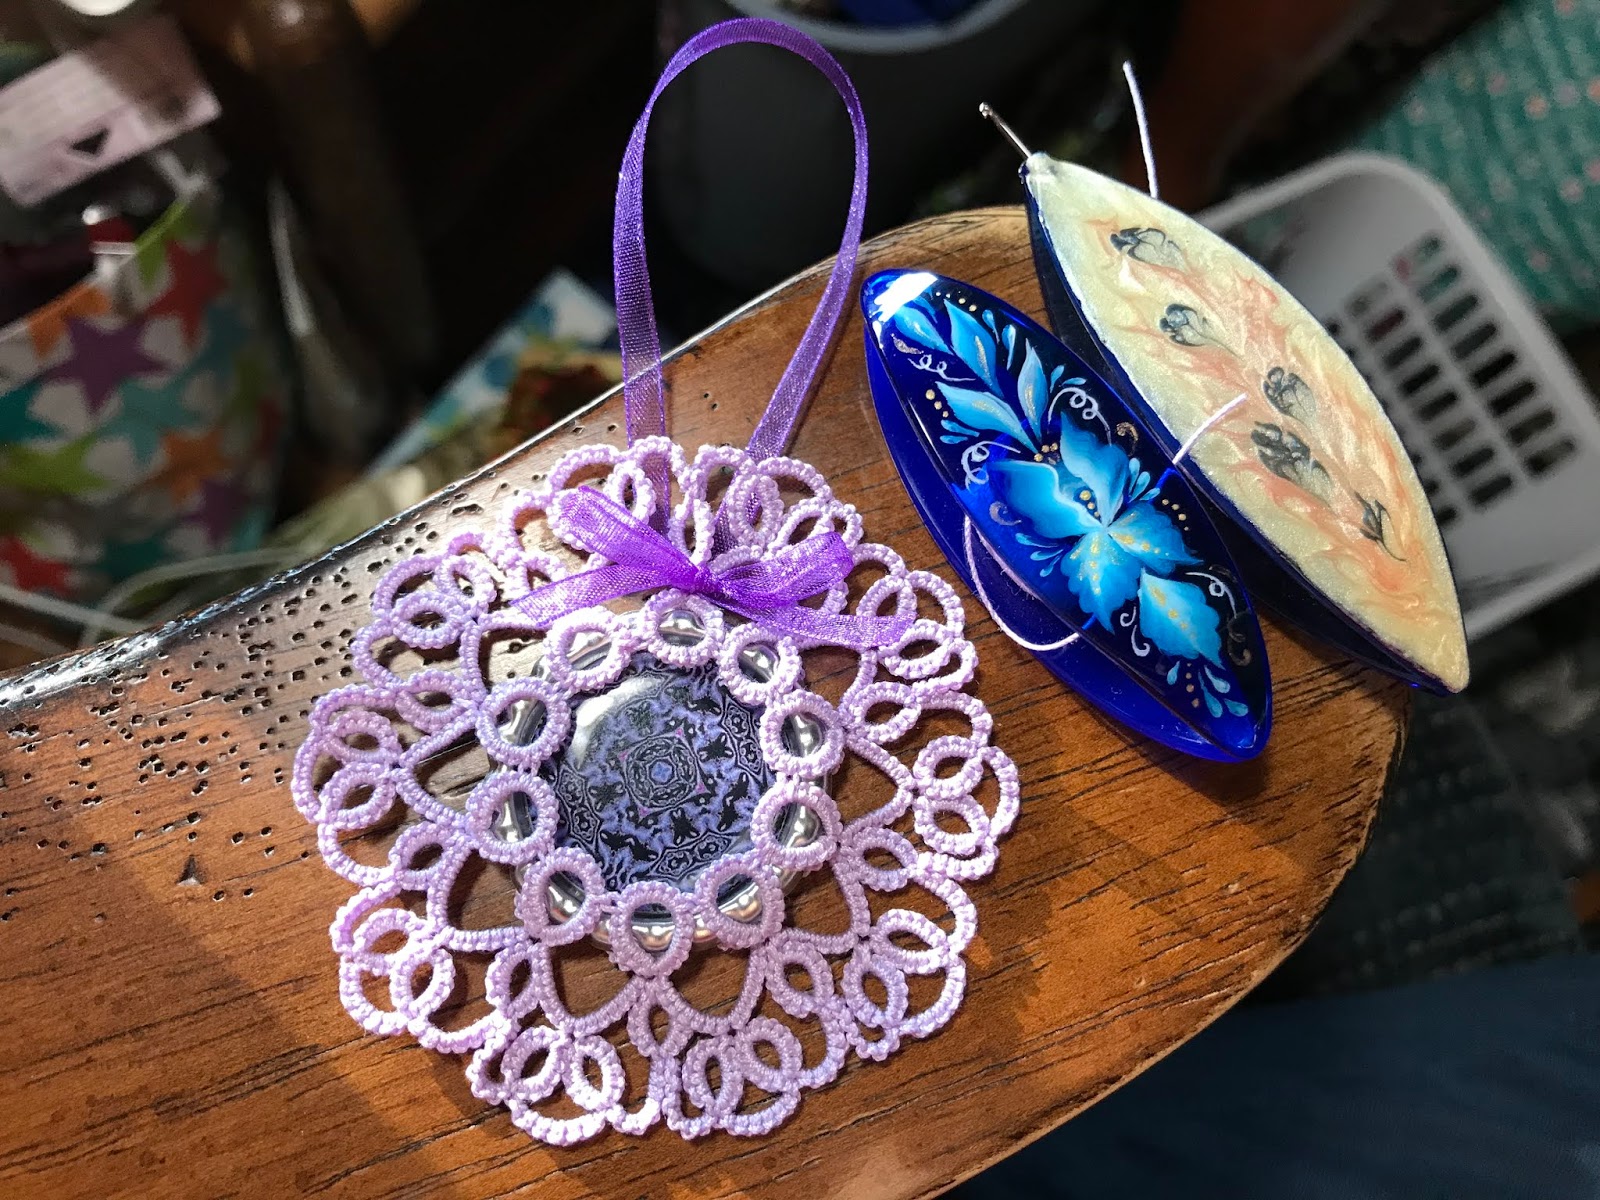
I've also been busy flattening bottle caps. A Facebook friend sent me a link to a video of a woman flattening bottle caps with a tortilla press. It works like a charm! I wouldn't recommend using your tortilla press for bottle caps if you like to make tortillas. They do mark up the press. Since I don't make tortillas, I'm happy to use my press strictly for bottle caps!


On the chicken front, one of the hens has decided that she likes to lay her eggs on the work table Dave has set up on the porch. Now that's what I call service!

Sunday, September 23, 2018

Tatting with circles

One of the things we like to do at Tollway Tatters is share. We share ideas, and we share goodies!


Yesterday, Sue brought large sequins to share with us, as well as patterns for the two sizes.


We had a low key day as Dave was recovering from a stomach bug that laid him low for two days. So, what do you do when you have a low key day? I tat! Let's be honest, I tat almost every day, but I enjoy having an excuse.

Thanks for the beautiful circles and the patterns, Sue! These will hang on my tree this year, and I will think of my friend Sue whenever I decorate!

Saturday, September 22, 2018

Tollway Tatters

We had a beautiful day for our Tollway Tatters meeting! It was sunny, and the air was crisp and cool! Not everyone was able to attend, but we had a nice sized group. I believe everyone had a wonderful time!


Carrie worked on Mary Konior flower fragments for decorating cards. She makes beautiful cards!

Carrie's daughter, Elizabeth, worked on quilling. She's quite good!


Glenda joined us from Iowa! She was working on making an Ice Drop in one pass. We managed to get through the whole process!


Elaine hadn't shuttle tatted in years. She's been needle tatting, but once she saw our Tollway Tatters shuttle, she was determined to take up shuttle tatting again. After mastering the flip, she practiced chains for a while and then attacked rings. She did a great job!


I met Kathy through a Facebook group. It turns out she only lives about ten miles from me! Kathy was excited to join a group of tatters for the day. If I remember correctly, she's working with size 70 thread.


Denise and I met Gail at Tatting Corner Tat Days this past July. When we found out she lived close by, we encouraged her to join us. We were so glad she was able to join us today! Gail was working from one of her new Japanese books, and she showed me how to use the iPad and Google translate to read the Japanese text. I'm going to have to give it a try!


Sue was working on a beautiful beaded piece. This is going to be for a raffle. The colors are gorgeous, and Sue's tatting is perfect!


Denise really wanted to tat today, but she has a deadline to meet for a church raffle. So, she spent the day crocheting a gorgeous single crochet ripple afghan.

So, what are Denise and Gail looking at? We had several ladies stop by to see what we were doing. They were so friendly and truly interested in what we were doing. They each left with an Ice Drop!


I worked on a one pass Ice Drop for a flattened bottle cap. This is what I planned on tatting today, so it worked out great that I was able to show Glenda exactly what to do!


When I got home, I hid my ends and added the ribbon. All in all, it was a wonderful tatting day!

Thursday, September 20, 2018

Bottle cap fever


I can't seem to stop tatting around flattened bottle caps. Yes, it takes a bit longer than an Ice Drop made with 3/4" glass gems, but I love the results. I finished this one before heading off to school this morning. The thread is Liz Metallic Turquoise Blue.


Today was a sub day, so I had a little bit of time to tat. This Disney Princess Ice Drop is in Liz Metallic Gem Stone. The color choice might not look terrific in the picture, but there is a bit of orange in the thread, and I think it looks great in person!

Wednesday, September 19, 2018

AWOT - Absent without tatting

Well, to be precise, very little tatting!


My friend Amy's dad is the local veterinarian. Amy's mom asked if I would make new curtains for the clinic, and I was happy to help out. As all of you know, any task we undertake requires time. So, I set aside the past few days for making curtains. Isn't the fabric adorable?


The Tollway Tatters now have an official shuttle, thanks to our dear friend Rita Richmond of Shuttle by Design! Rita designed a logo for us about a year ago.

For those of you who have never been to Illinois, there were seven oases spanning the toll roads. The one near O'Hare Airport was scheduled for demolition, but since I haven't headed north in a while, I'm not sure of that has happened yet. The Illinois state flower is the violet, and the state bird is the cardinal. I love the way tatting has "crowned" the TWT logo! When I asked Rita if she'd be able to design a shuttle for us, I never dreamed she'd come up with something so wonderful!


Knowing that we wear tie-dyed t-shirts so that we can be easily identified, Rita painted a tie-dye design on the back of the shuttles. Her attention to detail is amazing!

Rita does not have these shuttles posted on her site, but you can order them from her (shuttlebydesign@gmail.com). In fact, we would feel honored if you chose to order a shuttle that commemorates our little group! The Moonlit shuttles have a hook and are $22. The shuttles without hooks are ones that Rita makes herself, and they are $27. I love both styles!

By the way, Tollway Tatters will be meeting this Saturday, September 22, at the Hinsdale Oasis on 294. We meet at 10 a.m. and stay until somewhere between 2 and 3. If you're in the Chicago area, we would love to have you join us!


I thought I had missed out on these adorable little Tatting Fairy shuttles. I was caught up in tatting, decorating bottle caps, and other miscellaneous tasks. Luckily, I went to Rita's site anyway and I found there were still some available! I think we can all use a little fairy dust in our lives!


You know that I couldn't go completely tat free. I finished another Disney princess this morning. This one is with size 20 Liz Metallic Turquoise Blue. I think I'm going to have some very happy granddaughters!

Sunday, September 16, 2018

Capstar in Frappe


I had a little time to play this afternoon, so I tatted another Capstar Ice Drop. This one is in size 20 Liz Metallic Frappe. I made a slight change in this one by using only 5 picots instead of 7 on the outside rings. I think it looks fine, but I prefer the look of the 7 picots. You never know if you don't try!

Saturday, September 15, 2018

Bottle caps


I'm on a roll with bottle caps!


I've been busy decorating them, getting them ready to be used in Ice Drops.


I think the backs are kind of bland looking, so I'm painting them with glitter nail polish.


I think I might have to share a few!


I really wanted to tat with Liz Metallic Raspberry Pink. I wasn't inspired by any of the bottle caps, but I did like the way it looked with this crackled glass disk!


I think the crackles shop up better in a hanging position. Luckily, I have some more of these disks. I may have to do one up in each color of Liz Metallic!

Capstar

As I was tatting last night, I felt totally uninspired by the thread I was using, Liz Metallic Antique Gold. However, as I was drifting off to sleep an idea came to mind.


I woke up at 4:30 this morning, eager to get started. What started out as something very boring, quickly became a pattern that worked well with the Antique Gold thread. I asked Dave for an idea for a name, and he suggested Capstar. The name sounded familiar, so I Googled it and found out that it is the name of a flea and tick medicine for cats and dogs... hmmm. We bounced around a few other ideas, but Capstar stuck. If it keeps away fleas and ticks, that will be a bonus!

Would you like the pattern? Here it is!

Capstar Ice Drop
designed by Diane Cademartori
September 15, 2018

Supplies: size 20 Liz Metallic thread, two shuttles wound CTM, flattened bottle cap (available on Amazon, approximately 1 1/4”)

Round 1:
Ring 1: 6-6-6, reverse work
Ring 2: 6-6-6, fold away
Chain: 6-6, reverse work

*Ring 3: 6+6-6 (join to ring 1), reverse work
Ring 4: 6+6-6 (join to ring 2), fold away
**Chain: 6-6, reverse work

Repeat from * to ** 9 times (total of 10 pattern repeats), joining last two rings to first two rings. Insert cabochon before joining last ring. Do not reverse work after last chain.

Round 2:

Chain 7, lock join to picot on round 1, switch shuttles
Ring: 2-2-2-2-2-2-2-2 (7 picots), switch shuttles
Chain 7, lock join to base of ring on round 1


Repeat pattern 9 times. Cut, tie, and hide ends.

Thursday, September 13, 2018

Silver Crowns


There's been a rash of illness at school this week, so I've spent the last two days subbing. Time away from home, means less time for tatting. However, I have had enough energy left at the end of the day to design another Ice Drop.

As I started the second round, I was reminded of the beautiful crowns worn by European royalty. This pattern is designed for Liz Metallic thread, which tats up slightly larger than size 20 Lizbeth. I do like the way this one turned out!

For those of you not on Facebook, here's the pattern:

Silver Crowns Ice Drop

Supplies: size 20 Liz Metallic thread, shuttle and ball, flattened bottle cap (available on Amazon, approximately 1 1/4”)

Round 1:
Ring 1: 6-6-6, reverse work
Ring 2: 6-6-6, fold away
Chain: 6-6, reverse work

*Ring 3: 6+6-6 (join to ring 1), reverse work
Ring 4: 6+6-6 (join to ring 2), fold away
**Chain: 6-6, reverse work

Repeat from * to ** 9 times (total of 10 pattern repeats), joining last two rings to first two rings. Insert cabochon before joining last ring. Do not reverse work after last chain.

Round 2:

Chain 9, reverse work
Ring: 3+3-2-2-2 (join to picot on round 1), reverse work
Chain 3, lock join to 1st picot; chain 3, lock join to 2nd picot; chain 3, lock join to 3rd picot
Chain 9, lock join to base of ring on round 1


Repeat pattern 9 times. Cut, tie, and hide ends.

Tuesday, September 11, 2018

Bubbles Ice Drop pattern


I've written up the Bubbles Ice Drop pattern. Enjoy!

Thank you to Nancy Tomas for the name Bubbles Ice Drop... I LOVE it!

Supplies: size 20 Lizbeth thread, two shuttles wound CTM, flattened bottle cap (available on Amazon, approximately 1 1/4”)

Round 1:
Ring 1: 7-7-7, reverse work
Ring 2: 7-7-7, fold away
Chain: 7-7, reverse work

*Ring 3: 7+7-7 (join to ring 1), reverse work
Ring 4: 7+7-7 (join to ring 2), fold away
**Chain: 7-7, reverse work

Repeat from * to ** 9 times (total of 10 pattern repeats), joining last two rings to first two rings. Insert cabochon before joining last ring. Do not reverse work after last chain.

Round 2:

Split ring: 7/7, do not reverse work
*Chain: 7, reverse work
Ring: 7+7 (join to picot on round 1), reverse work
Chain: 7, reverse work
Ring: 7+7 (join to same picot), reverse work
Chain: 7, reverse work
Ring: 7+7 (join to base of next ring on round 1), reverse work


Continue following pattern from * to the end, joining the last chain to the top of the split ring. Cut, tie, and hide ends.

Bubbles


Nancy Tomas had suggested Bubble Top Ice Drop for my last one. I liked the name, and it got me to thinking about another design. I thought you might like to see the steps for this pattern. As you can see, I'm working with a flattened bottle cap that I've decorated with a 1" round cutout and acrylic dome. The rings are the same for the front and back, 7-7-7; the chains are 7-7... very simple.


The 10 ring pattern makes the insertion of the bottle cap a little tight, but it fits well once in place.


The pattern is a bit ruffled, but a shot of steam sets everything in place. I actually don't mind the ruffled bit, and I can't help but wonder if it might be a nice design element if done in a metallic thread, which is stiffer.


I really like the way this one turned out. I'm calling it Bubbles. Thanks for the inspiration, Nancy!


On the chicken front, I couldn't resist taking this picture of Dave feeding his chickens mealworms. They were eating right out of his hand!

Saturday, September 8, 2018

Good news!


The Pop Top Ice Drop pattern works with both types of bottle caps! With the flattened bottle cap, the pattern lies more to the back, and with the regular bottle cap, the pattern is toward the top of the bottle cap creating a sort of shadow box effect. I really like it!


Here are the two types of bottle caps. The top is the regular one, and the bottom is the flattened one. No, I will not be flattening bottle caps. I would just make a mess of them, and they're not expensive.


If you think of the ten back ring, front ring, chain repeats as the basic pattern, I'll bet you can think of all sorts of pattern possibilities.


I didn't paint the back with glitter nail polish as I did with the flattened bottle cap yesterday. There is a difference in the fit. I thought the regular bottle cap would be a tighter fit, but it turned out that the flattened bottle cap fit more snugly.


For those of you who like to see which shuttles I used, here's the shuttle shot!

How did I do it?


First, I was asked to post a shuttle shot. Here it is! I do love my shuttles!

So, how did I do this?


First, I purchased bottle caps and flattened bottle caps on Amazon. There is a difference in the thickness, of course. I haven't played with the regular bottle caps yet. I purchased the flattened bottle caps in silver tone, and chose the colorful variety pack for the regular bottle caps.

I also purchased 1" paper rounds for decorating bottle caps. It was simple to glue the decorations to the bottle caps and then cover them with adhesive acrylic domes... all available on Amazon. Yes, I would have purchased them locally if I could, but there are no places that carry these supplies near me.


Then the flattened bottle caps were ready for tatting! I love Linda Slater Barnes' suggestion for the name... Pop Top Ice Drops. For those of you who aren't members of Ice Drop Addicts on Facebook, here's the pattern...

Pop Top Ice Drop Pattern:

Supplies: size 20 Lizbeth thread, two shuttles wound CTM, flattened bottle cap (available on Amazon, approximately 1 1/4”)

Round 1:
Ring 1: 7-7-7, reverse work
Ring 2: 7-7-7, fold away
Chain: 7-7, reverse work

*Ring 3: 7+7-7 (join to ring 1), reverse work
Ring 4: 7+7-7 (join to ring 2), fold away
**Chain: 7-7, reverse work

Repeat from * to ** 9 times (total of 10 pattern repeats), joining last two rings to first two rings. Insert cabochon before joining last ring. Do not reverse work after last chain.

Round 2:

Chain: 7-7, reverse work
Ring: 7+7 (join to picot in round 1), reverse work, switch shuttles
Ring: 7-7, do not reverse work, switch shuttles
Chain: 7-7, lock join to base of ring in round 1
Chain: 7
Split ring: 4-4/4+4 (join to picot in round 1)
Chain: 7, lock join to base of next ring in round 1


Repeat this pattern 4 times. Cut, tie, and hide ends.

Friday, September 7, 2018

Flattened Bottle Cap


I purchased and decorated flattened bottle caps from Amazon. They're 1 1/4" in diameter. I hope to have my Flattened Bottle Cap Ice Drop pattern ready tomorrow. I wish I could come up with clever names!

Thursday, September 6, 2018

Sixes and Sevens


I fiddled around with a new Ice Drop idea today. I used a 1" cabochon, so the patterns I've been using would not work. I call this Sixes and Sevens, because all the rings and chains are multiples of six and the pattern is repeated seven times.


Since the design on the cabochon has a paper backing, I coated it with sparkly nail polish. I'm not sure the nail polish would keep the paper backing in place if it was soaked, but it should help keep the cabochon looking nice for a long time.

I'm not really fond of the uneven look of seven pattern repeats. I much prefer the symmetry of six. Still, if there's enough interest, I'll write up the pattern. I have quite a few 1" cabochons, so I'll keep experimenting!

Wednesday, September 5, 2018

Ice Drop fun


I do enjoy playing with the basic Ice Drop to see how I can vary the look without a full blown design change. This is the basic pattern with five graduated picots. The shuttle is from Pekalo Designs on Etsy. The little took is for adjusting the tips, and it works very well!


This is the basic pattern done in one pass, which eliminates the chains next to the glass gem. Most of the time, I prefer the basic pattern, but I do understand the appeal of showing more of the glass gem. The shuttle is from Grizzly Mountain Arts. I love Dave's new rose design!


Mandy Kerwell-Bez designed "Hope." She's a needle tatter from France, and her designer are marvelous! I love my little owl shuttle from Grizzly Mountain Arts!